
Hardware Installation and System Setting
Hardware Installation ProfessionalHardware Installation Professional 2.0Hardware Installation Compact
Interactive-Home is a video guide for configuration of stair steps automatic lighting system using the "Professional" controller. The system is distinguished by easiness of installation and configuration.
Connection Scheme

Step to Step
Preparatory stage
-
Determine the location of the mounting box (controller);
-
Determine the location of motion sensors (motion sensors should be obligatory installed at the beginning of the first and the last steps. Horizontal distance from the sensor to the step beginning is about 20cm and the vertical distance is about 20– 25cm);
-
Determine the location of alternate switches (near the first and the last steps);
-
Route wires:
- controller power supply line (to the mounting box);
- from each step to the controller (eg, ШВВП 2х0,5);
- from each motion sensor to the controller (for example a signal 6-conductor cable);
- form each alternate switch to the controller (for example ШВВП 3х0,5).
Hardware installation

-
Mount the controller on the DIN-rail in the mounting box;
-
Mount 8-channel module on the DIN-rail in the mounting box and connect it to the controller;
-
Connect the controller to the previously laid wires according to the wiring diagram;
-
Connect the light sensor (only one sensor is connected in the area where the change of the "day-night" cycle is most obvious;
-
Connect and install motion sensors in accordance with the leads numbering;
-
Connect the alternate switches according to the wiring diagram;
-
Connect the power supply unit;
-
Carefully check the correct connections.

-
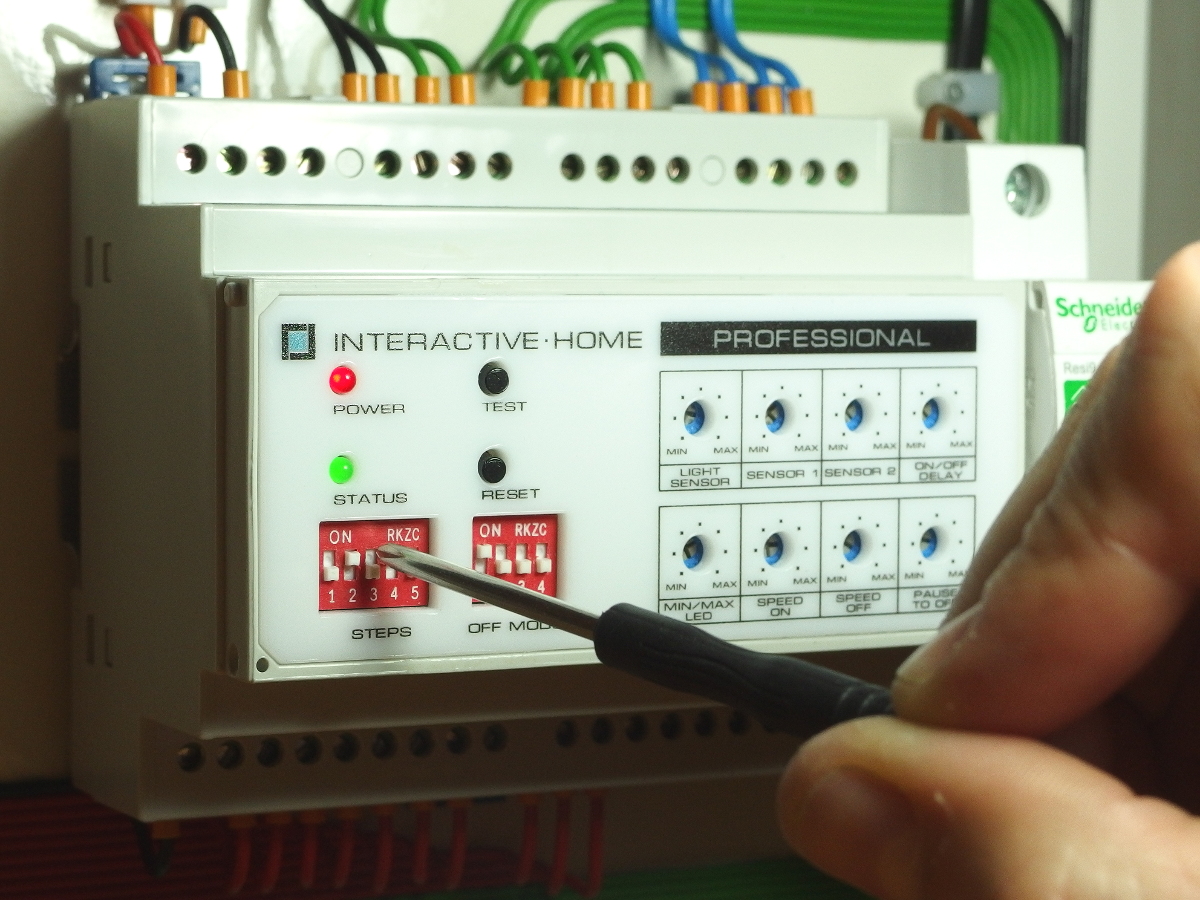
Set the number of steps with "steps" switch;
-
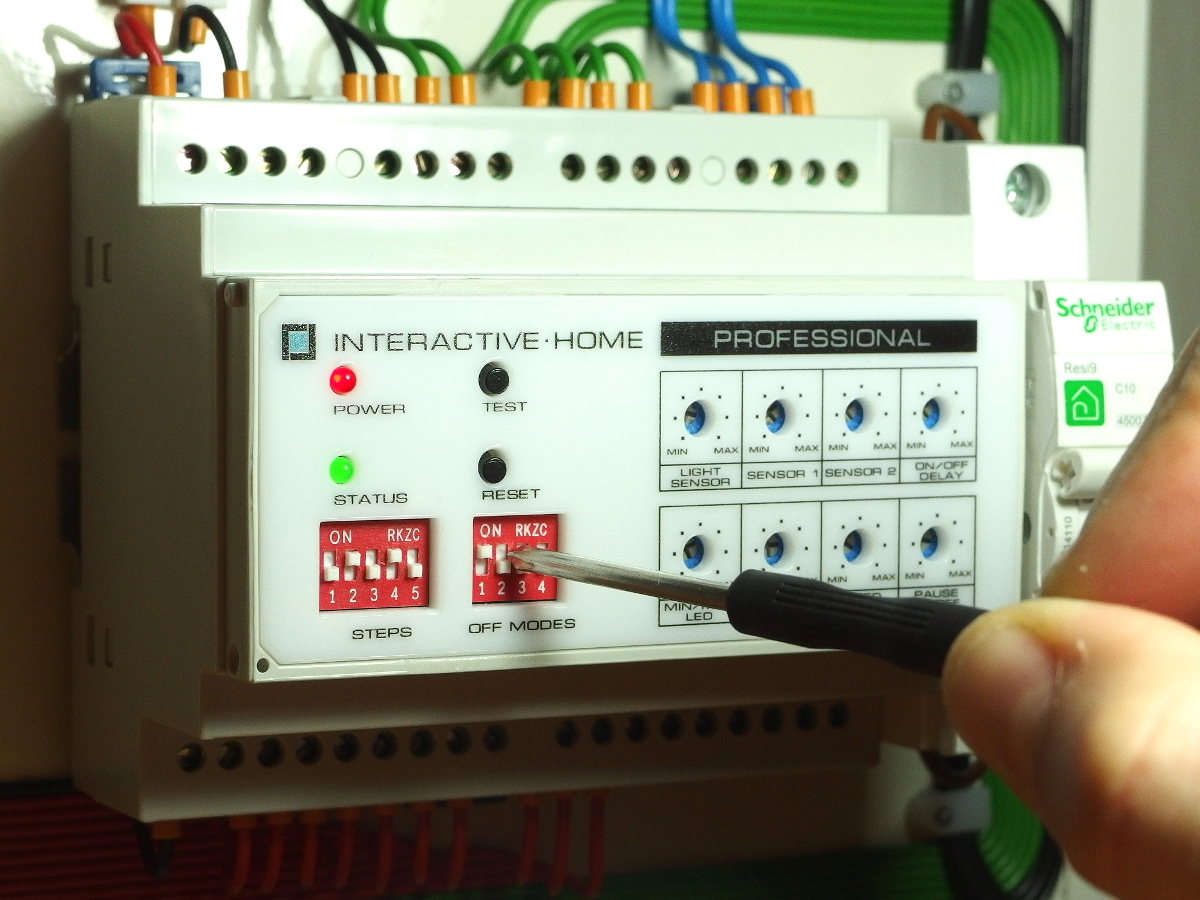
Set the switch off mode with "off modes" switch;
-
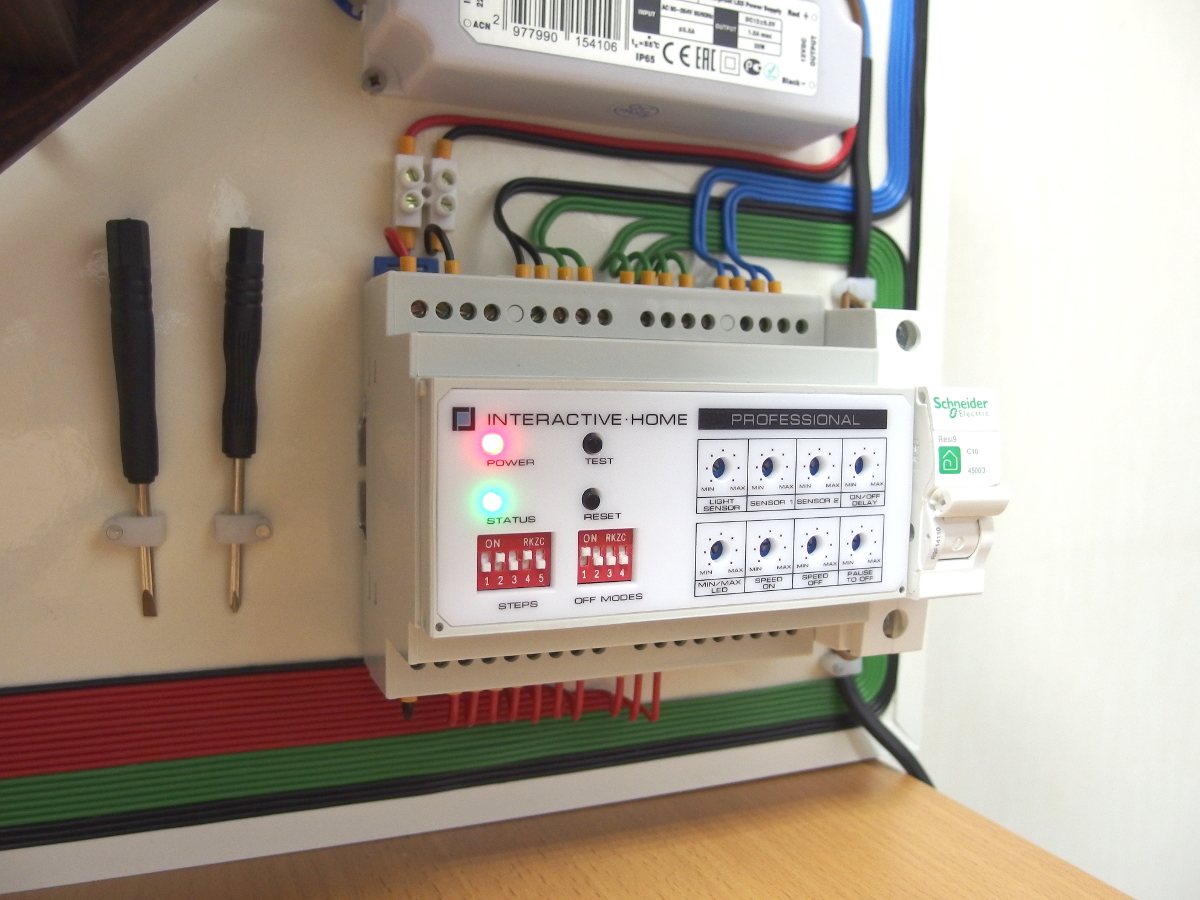
Supply 12 V to the assembled system. Red "power" indicator is used for power supply indication;
-
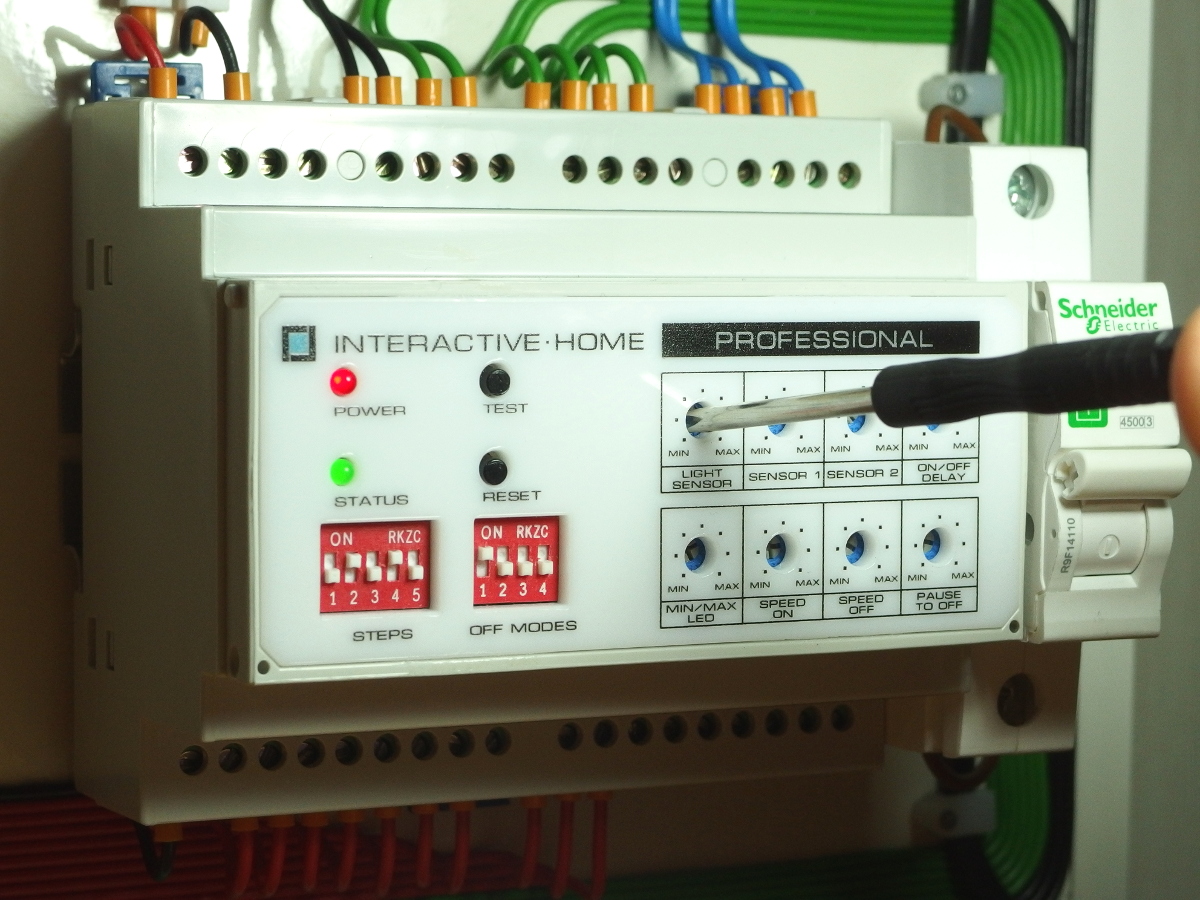
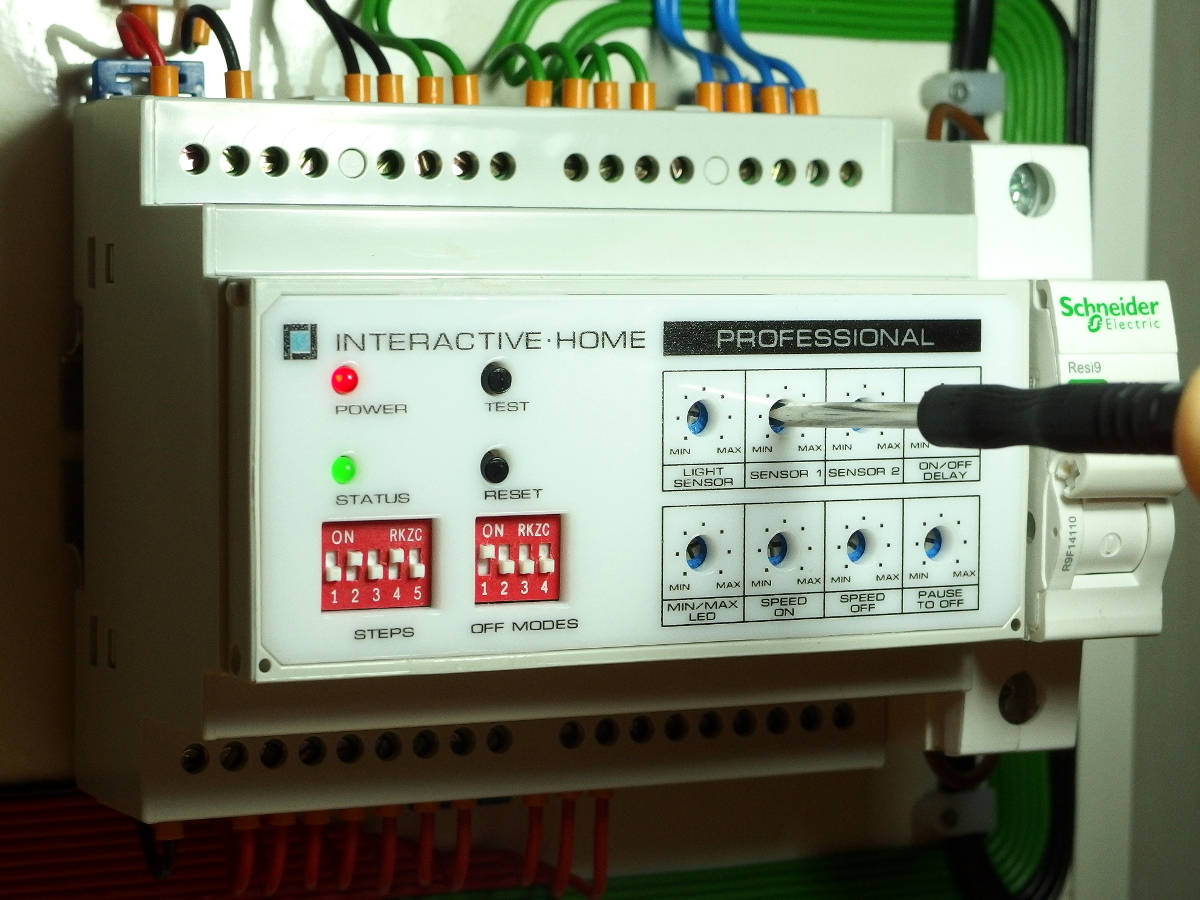
To activate the "Night" lighting mode slowly rotate "light sensor" control (selection of luminance threshold) until the green "status" indicator (status) lights up. At the same time the pilot lighting of the first and the last steps should turn ON;
-
Adjust the motion sensors range using "sensor 1" control (lower sensor) and "sensor 2" control (upper sensor). Their range can be changed from 10 cm to 120 cm;
-
Adjust the light intensity for the whole stair using "min / max led" control (minimum / maximum intensity of LED strips);
-
Set the speed at which the steps lighting will turn ON using "speed on" control;
-
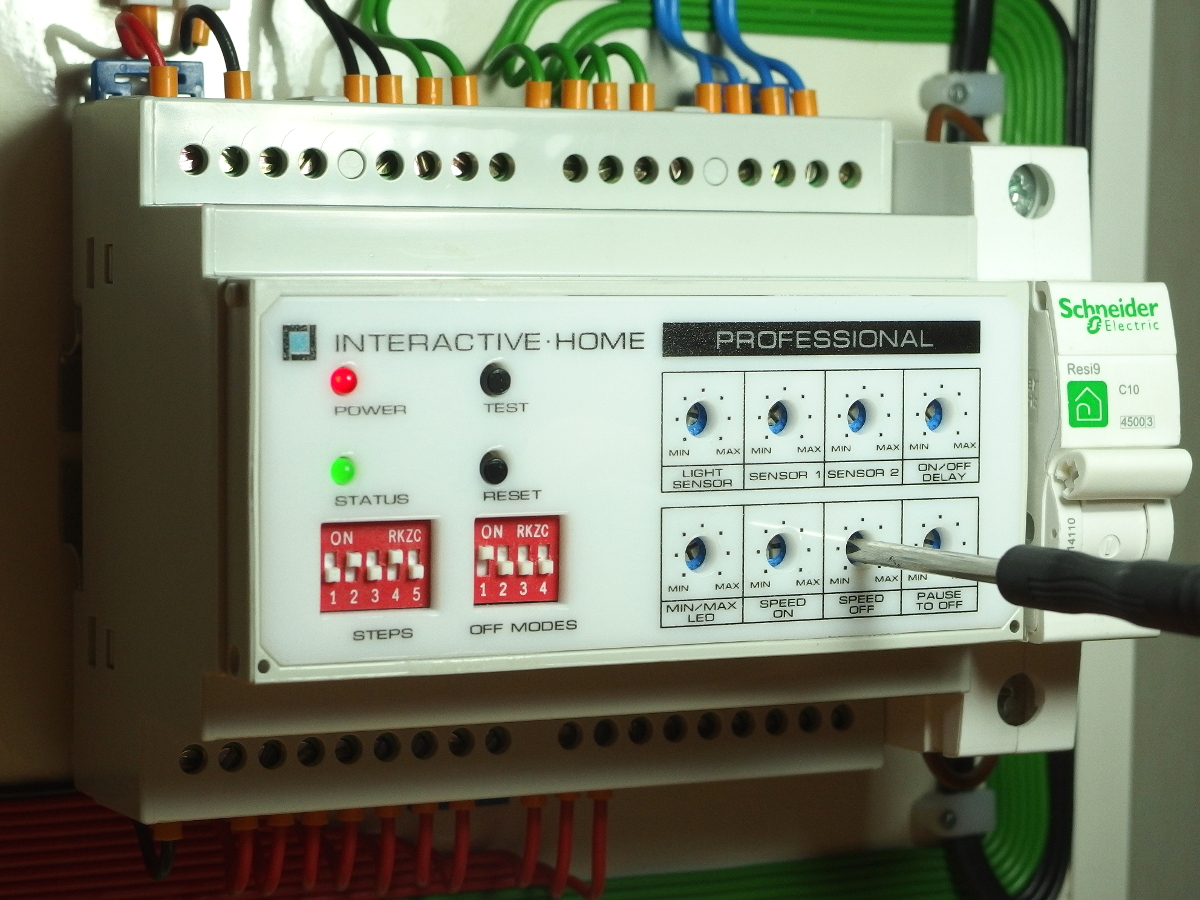
Set the speed at which the steps lighting will turn OFF using "speed off" control;
-
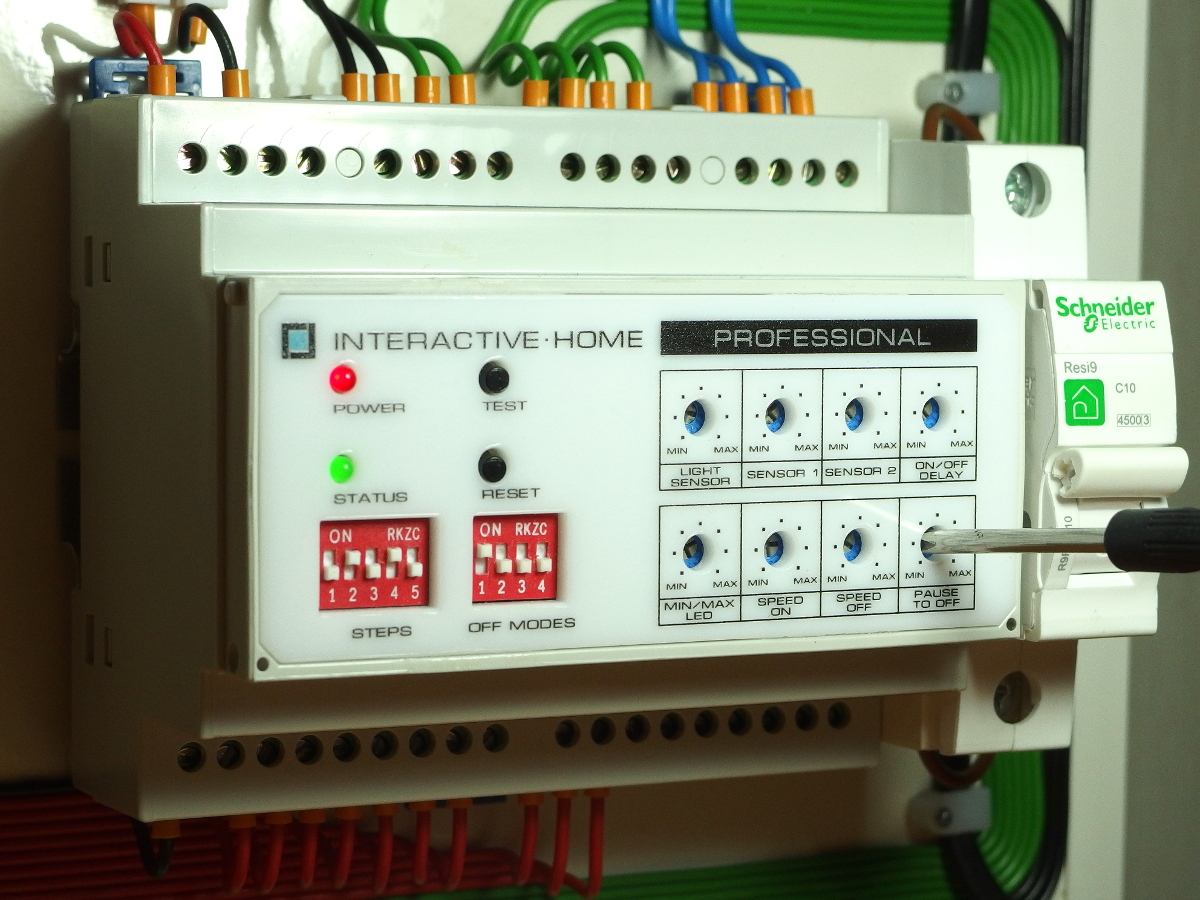
Set the pause before the step lighting turning off using "pause to off" control (pause before turning off). The adjustment range is from 0 to 10 seconds;
-
Check the made settings. Repeat steps 1 -10 if necessary - 10;
-
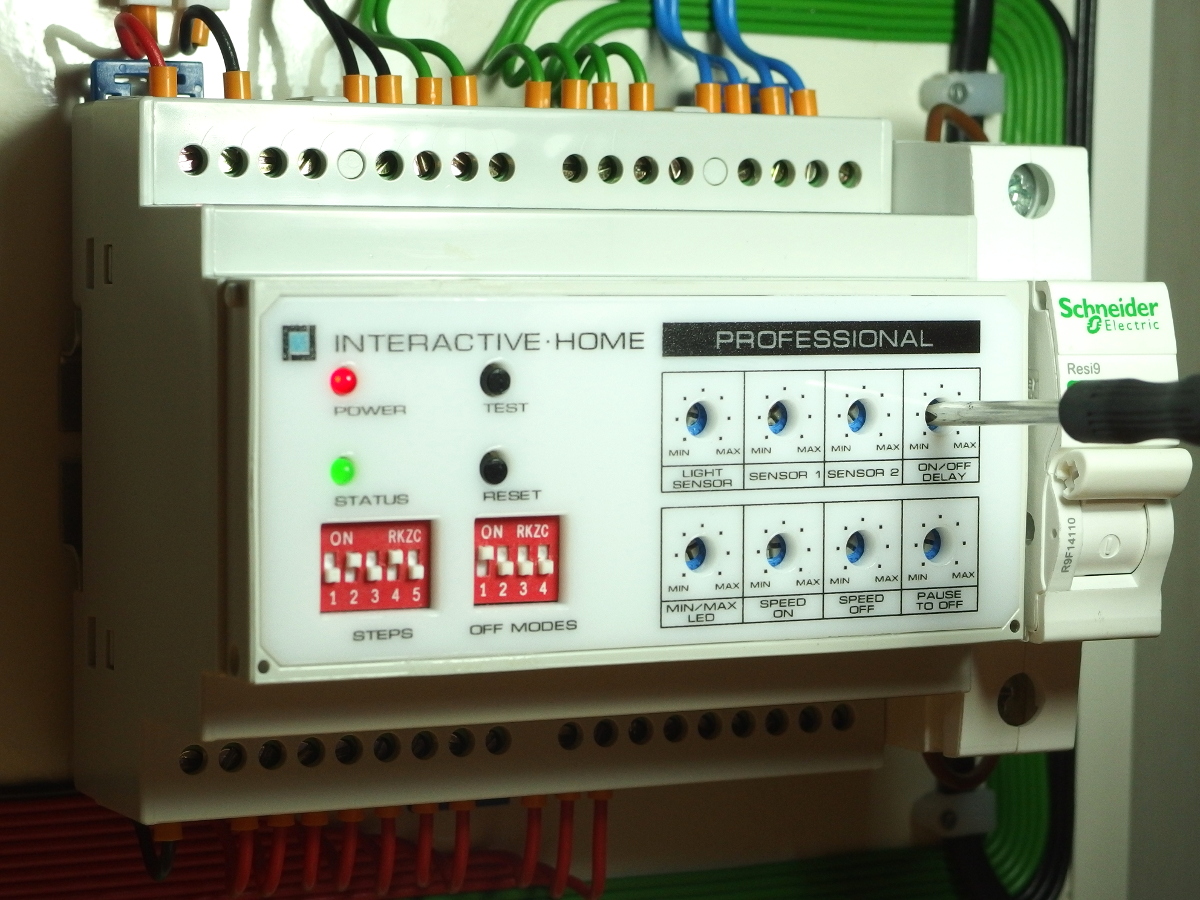
To prevent false response of the light sensor due to accidental shading set the delay of the "night" mode activation (mode ON delay) using "on / off delay" control.