
Hardware Installation Compact
Hardware Installation ProfessionalHardware Installation Professional 2.0Hardware Installation Compact
Quick guide to installation and setup of automatic stair lighting via "Compact" controller.
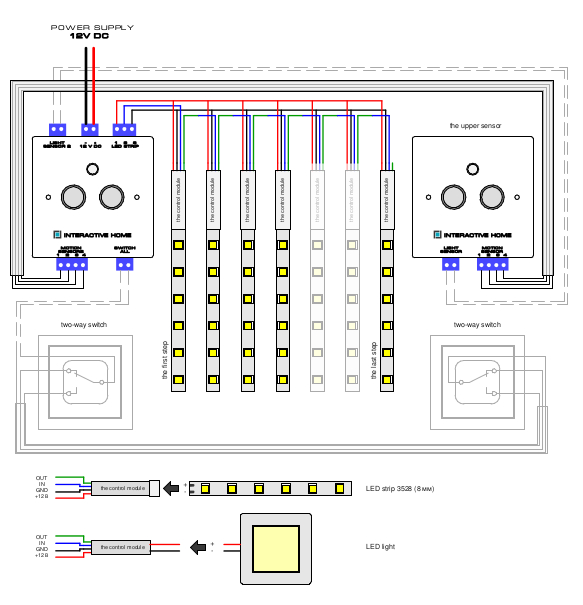
Connection Scheme
Step to Step
Preparatory stage
-
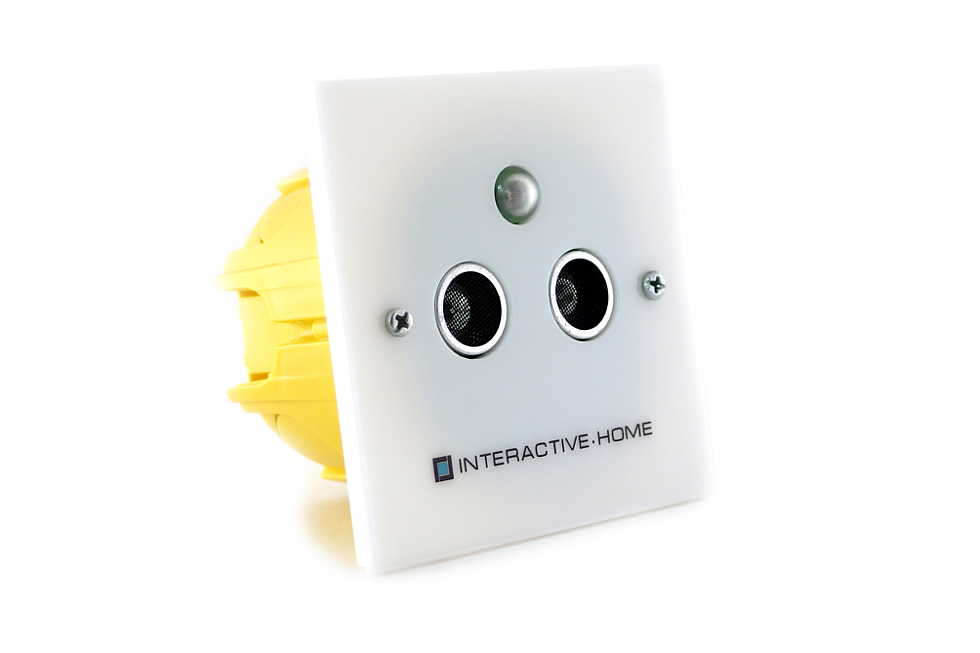
Choose the location for installing of motion sensor (motion sensors should be obligatory installed at the beginning of the first and the last steps. Horizontal distance from the sensor to the step beginning is about 20cm and the vertical distance is about 20 – 25cm);
-
Choose the location for installing of two-way switches;
-
Route wires:
- controller power supply line (to the mounting box);
- from control unit (lower sensor) to upper sensor (6 x 0,35mm for examle);
- from control unit to ligt units according to connection scheme;
- form each alternate switch to the controller (if needed).
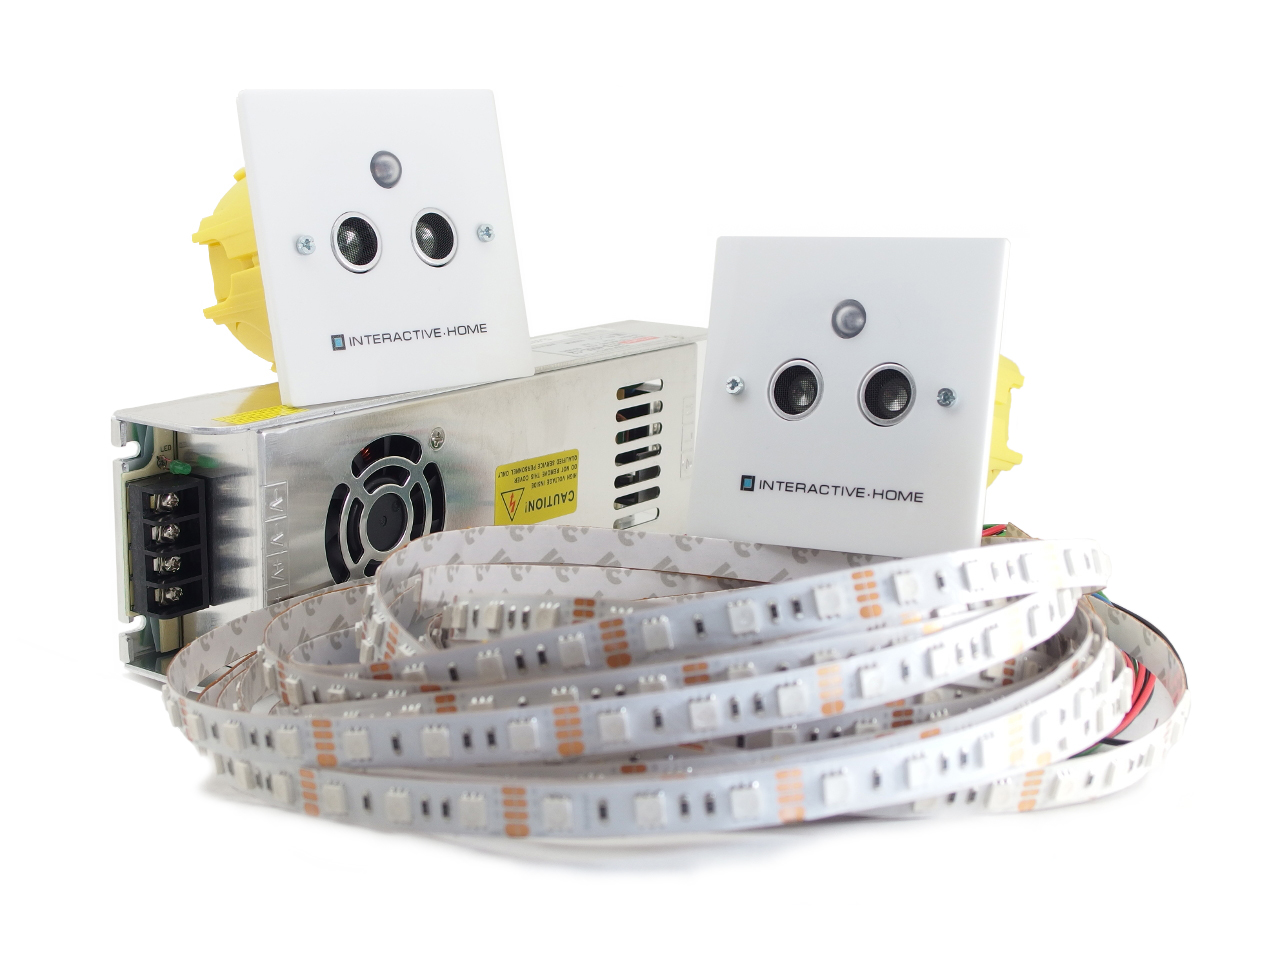
Hardware installation
-
Install the control unit (lower sensor);
-
Install the upper sensor;
-
Connect the control unit and the upper sensor according to the scheme of connection;
-
If there is necessary connect the upper light sensor, moves red switch of controller to the OFF position;
-
Connect the two-way switches according to the scheme of connection (if necessary);
-
Connect the alternate switches according to the wiring diagram;
-
Connect the power supply unit;
-
Carefully check the correct connections.
System setting
-
1

-
2
-
3
-
4
-
5
-
6

-
7

-
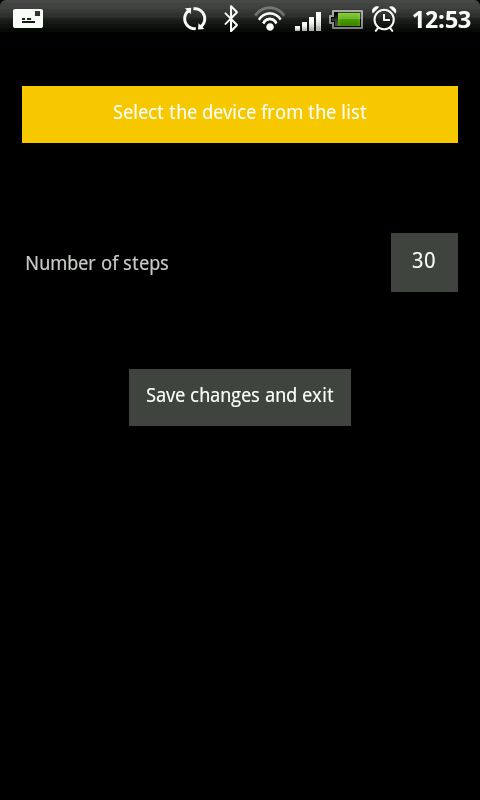
Install the mobile app on your smartphone or tablet to configure the system;
-
Configure the number of steps;
-
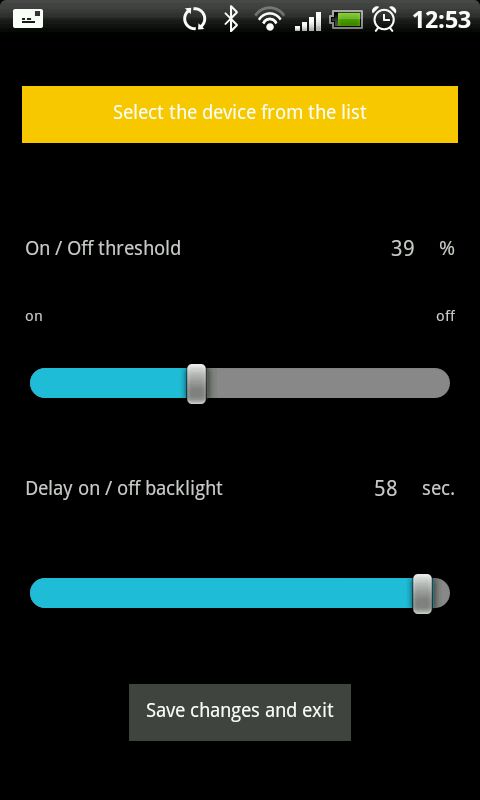
Set the threshold of turning on/turning off of the backlight and delay of turning on/turning off the backlight;
-
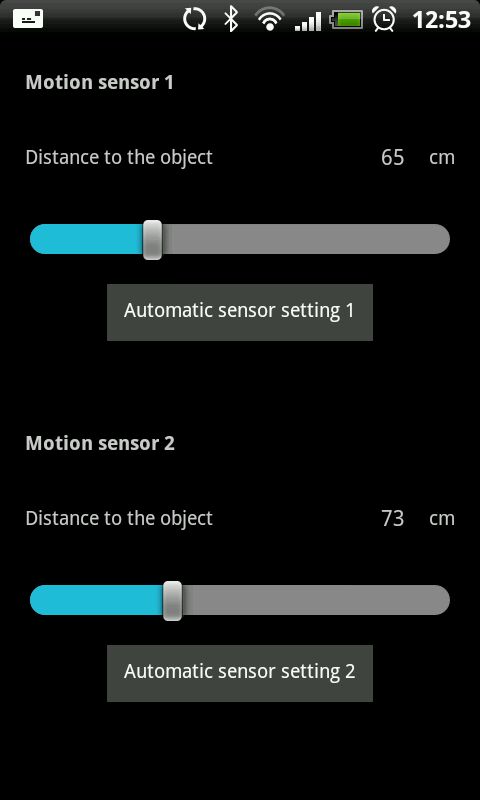
Activate motion sensors and configure distance to reacting object;
-
Configure the individual settings according to personal preferences;
-
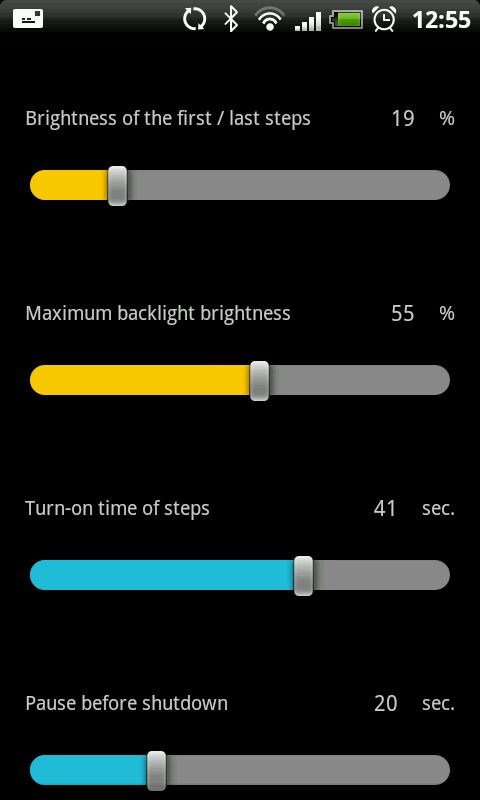
Set the time for turning on of step lights, pause before shutdown and the turn-off time of step lights in the "Settings" menu;
-
When using RGB LED strips, set the strip type to "multicolor RGB" and adjust the color.